Difference between revisions of "Modding add monster"
From Wildermyth Wiki
| (5 intermediate revisions by one other user not shown) | |||
| Line 1: | Line 1: | ||
This page | This page walks through the process of adding a new monster with a custom image. The focus is on getting something simple which you can see in the game, and adding more details later. The description and screenshots are current as of November 2019, early access version 0.10+98 Ryvio Wartmarch. | ||
==Preparation== | ==Preparation== | ||
Before you begin, create or find an image file for your monster. It should be a few hundred pixels in each dimension (not tens, and not thousands) and should have a transparent background. Please be sure it does not have any copyright restrictions, that is, the image should be one you drew, or one which is clearly public domain. We will use this guy: | Before you begin, create or find an image file for your monster. It should be a few hundred pixels in each dimension (not tens, and not thousands) and should have a transparent background. Please be sure it does not have any copyright restrictions, that is, the image should be one you drew, or one which is clearly public domain. We will use this guy: | ||
[[File | |||
[[File:ModdingMonsterRedDragon.PNG]] | |||
==Getting started== | ==Getting started== | ||
| Line 13: | Line 14: | ||
<ol> | <ol> | ||
<li>Using a file explorer, navigate to the game install directory: steam\steamapps\common\Wildermyth\assets. We need to copy (not move!) several files from there to your mod directory. For each file when it is mentioned below, create folders in your mod as needed and copy, and then modify. These files are program source code and proper syntax is very important. | <li>Using a file explorer, navigate to the game install directory: steam\steamapps\common\Wildermyth\assets. We need to copy (not move!) several files from there to your mod directory. For each file when it is mentioned below, create folders in your mod as needed and copy, and then modify. These files are program source code and proper syntax is very important. | ||
<li>Add the | <li>Add the monster definition. Copy file data\monsters\animal_goat.json, and call the new file davea_monster1.json. On the line where the image is shown, change to misc/davea_monster1: | ||
<syntaxhighlight lang="json"> | <syntaxhighlight lang="json"> | ||
[ | "skin": [ | ||
{ | { | ||
" | "image": [ "misc/davea_monster1" ] | ||
} | } | ||
] | ] | ||
</syntaxhighlight> | </syntaxhighlight> | ||
<li>Copy the image file to figures\misc\davea_monster1.png. (Filenames appear to be case sensitive, davea_monster1.PNG appears to not work.) | |||
<li>Add the name and blurb for the item. Copy and modify file text\dynamic\dynamic.properties. Delete all the text and add these lines: | <li>Add the name and blurb for the item. Copy and modify file text\dynamic\dynamic.properties. Delete all the text and add these lines: | ||
<br><code> | <br><code> | ||
<nowiki>#</nowiki>suppress inspection "UnusedProperty" for whole file | <nowiki>#</nowiki>suppress inspection "UnusedProperty" for whole file | ||
<br> | <br>davea_monster1.name=Davea's monster | ||
<br> | <br>davea_monster1.blurb=Davea's monster's blurb | ||
</code> | </code> | ||
<li>Later, you can look at other monsters in the source directory and change the monster's abilities, health and difficulty scaling to suit. | |||
</ol> | </ol> | ||
==Seeing the effect in game== | ==Seeing the effect in game== | ||
# If you haven't already done so, enable developer mode. (Save and exit before doing this.) In file explorer, create an empty file under steam\steamapps\common\Wildermyth called devmode.txt. | # If you haven't already done so, enable developer mode. (Save and exit before doing this.) In file explorer, create an empty file under steam\steamapps\common\Wildermyth called devmode.txt. | ||
# | # Choose tools from the game main menu, then select combat lab. This will give you a chessboard-like battle map with a few characters and monsters already spawned. | ||
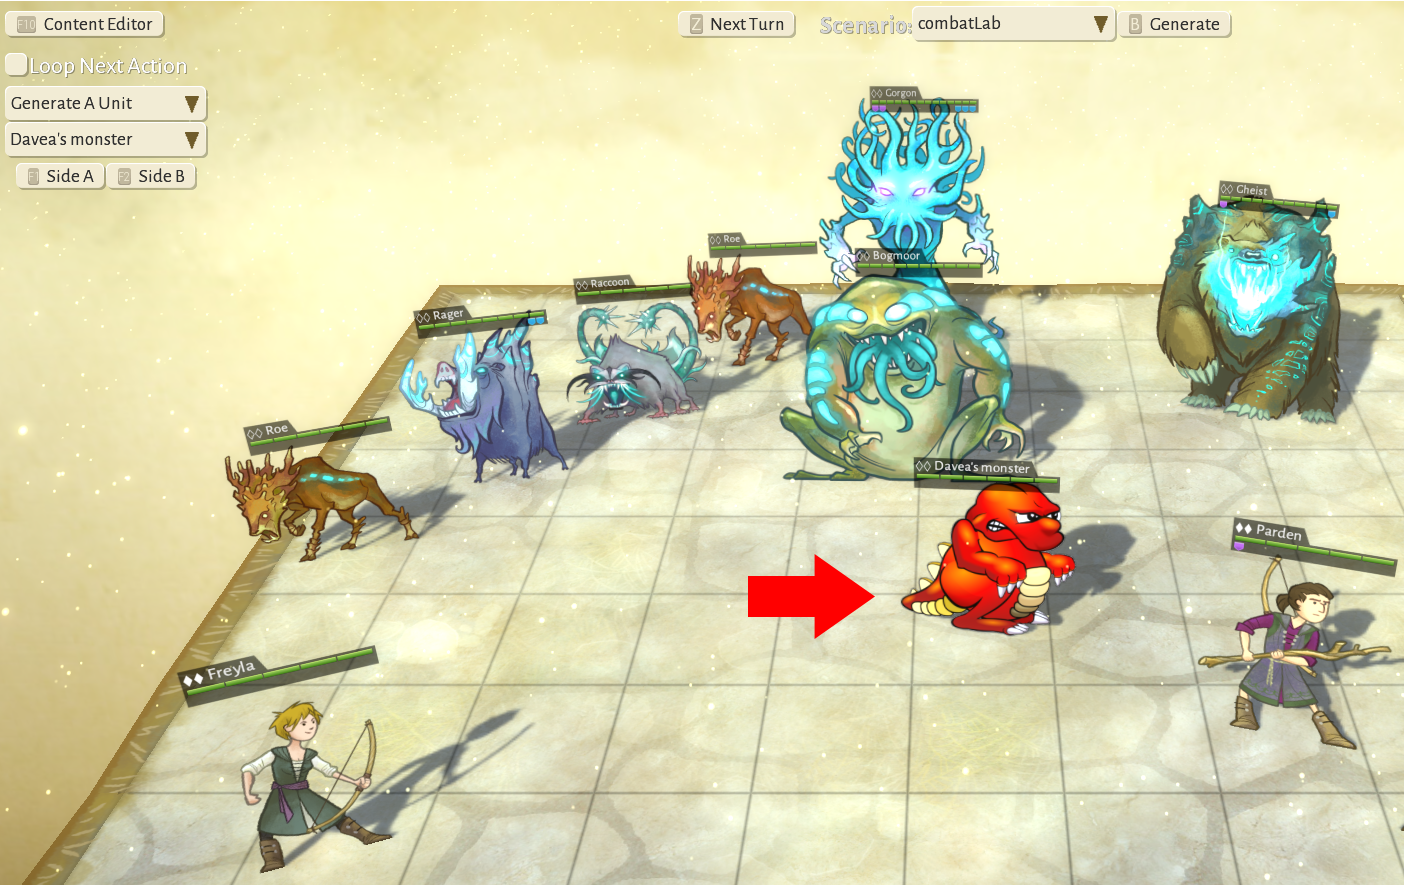
# In the "Generate a unit" dropdown at the left, choose "Davea's monster" and then click Side A. Your monster should appear: | |||
# | [[File:ModdingMonsterPickMe.PNG]] | ||
[[File: | |||
[[Category:Modding]] | |||
[[Category:Modding Guides]] | |||
[[ | |||
Latest revision as of 21:09, 4 December 2019
This page walks through the process of adding a new monster with a custom image. The focus is on getting something simple which you can see in the game, and adding more details later. The description and screenshots are current as of November 2019, early access version 0.10+98 Ryvio Wartmarch.
Preparation
Before you begin, create or find an image file for your monster. It should be a few hundred pixels in each dimension (not tens, and not thousands) and should have a transparent background. Please be sure it does not have any copyright restrictions, that is, the image should be one you drew, or one which is clearly public domain. We will use this guy:
Getting started
- Select "Tools" at the main game screen, then "Open Editor", then "Content and Comics Editor"
- At the upper left, click "Mods", click "Create New Mod" in the browser, and fill in the form. This will pop up a file browser showing the files the tool just created; note that the directory is steam\steamapps\common\wildermyth\mods\user\<your mod name>. You will use this directory soon.
- Click the "save" button and then exit. Most of the work for this mod is done outside the in-game editor; the editor doesn't appear to support creating monsters yet.
Modifying the files
- Using a file explorer, navigate to the game install directory: steam\steamapps\common\Wildermyth\assets. We need to copy (not move!) several files from there to your mod directory. For each file when it is mentioned below, create folders in your mod as needed and copy, and then modify. These files are program source code and proper syntax is very important.
- Add the monster definition. Copy file data\monsters\animal_goat.json, and call the new file davea_monster1.json. On the line where the image is shown, change to misc/davea_monster1:
"skin": [
	{
		"image": [ "misc/davea_monster1" ]
	}
]
- Copy the image file to figures\misc\davea_monster1.png. (Filenames appear to be case sensitive, davea_monster1.PNG appears to not work.)
- Add the name and blurb for the item. Copy and modify file text\dynamic\dynamic.properties. Delete all the text and add these lines:
#suppress inspection "UnusedProperty" for whole file

davea_monster1.name=Davea's monster

davea_monster1.blurb=Davea's monster's blurb - Later, you can look at other monsters in the source directory and change the monster's abilities, health and difficulty scaling to suit.
Seeing the effect in game
- If you haven't already done so, enable developer mode. (Save and exit before doing this.) In file explorer, create an empty file under steam\steamapps\common\Wildermyth called devmode.txt.
- Choose tools from the game main menu, then select combat lab. This will give you a chessboard-like battle map with a few characters and monsters already spawned.
- In the "Generate a unit" dropdown at the left, choose "Davea's monster" and then click Side A. Your monster should appear:

