Outcomes
These are things that happen! Generally (always?) you'll be seeing these in the context of Effects. For some less technical descriptions, take a look at the Types of Outcomes we support.
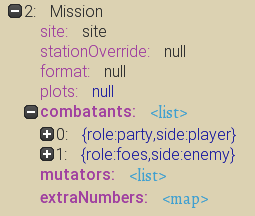
Mission
Starts a fight to the death. A fair amount of stuff can be specified here.
- sitePlanOverride: Overrides the site plan (environment) that the mission takes place in (cave, forest shrine, library, etc.)
- format: Overrides the format of the mission (assault, defense, ambushed, or arena)
Combatants
The people and monsters fighting in this battle.
You can now set the role of a combatant and their side. You don't need to use party or foes, so if you want an event with only one player fighting, go for it. You can also put NPCs on your side, which you'll be able to control. (Even monsters! Though, maybe use with caution? It's not really supported right now?)
You can specify a customThreat, which can include a flavor and strength (if not set, they use the defaults), or you can specify specific monsterTracks.
You can add custom items to humans, either via ID or by Role. By ID is nice and easy, standard items. By Role is probably for when you want an item to have certain aspects, and you create it beforehand in the implications. In both cases, items will be equipped to the combatant for the duration of the mission. If you want a player to keep an item afterward, you can add an AddGear Outcome to manage that.
Combat Modifiers
Add advantages or disadvantages to the player faction
- type: Should the player have an advantage, or a disadvantage?
- number: How many advantages/disadvantages should the player have? (This many will be picked randomly based on the type)
- specificModifiers: If set, these specific modifiers will override the type and number fields.
Modifiers include the following:
Advantages:
- Fortitude: All party members gain 1 temporary hitpoint
- Courage: All party members gain +1 damage/potency (3 turns)
- Cunning: Flanking attacks this combat deal +1 damage
- Intimidation: All foes suffer 2 damage to start the mission
- Insight: Double the stunt chance for all party members
- Endurance: All party members gain 1 armor and 1 warding (2 turns)
Disadvantages:
- Nausea: All party members lose 1 hitpoint.
- Disorder: Walling provides no armor this combat.
- Misalignment: All augment bonuses are nullified this combat.
- Dismay: All foes gain 1 hitpoint to start the mission.
- Wound: One party member loses half hit points to start combat.
- Disable: One party member gains stun(2) to begin combat
Some Other Notes on Missions
- If you want to fight someone from your party (as a doppelganger or possessed or whatever), don't just put the actual player on the enemy side, because then they'll actually die. Instead, make a clone of them in Implications!
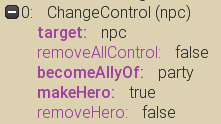
ChangeControl
Used to assign control of the given target to a given controller.
Using something like becomeAllyOf: party and makeHero: true will recruit the given role to your party!
Tidings
Tidings can be used to create follow-up anecdotes to events. To create a Tiding:
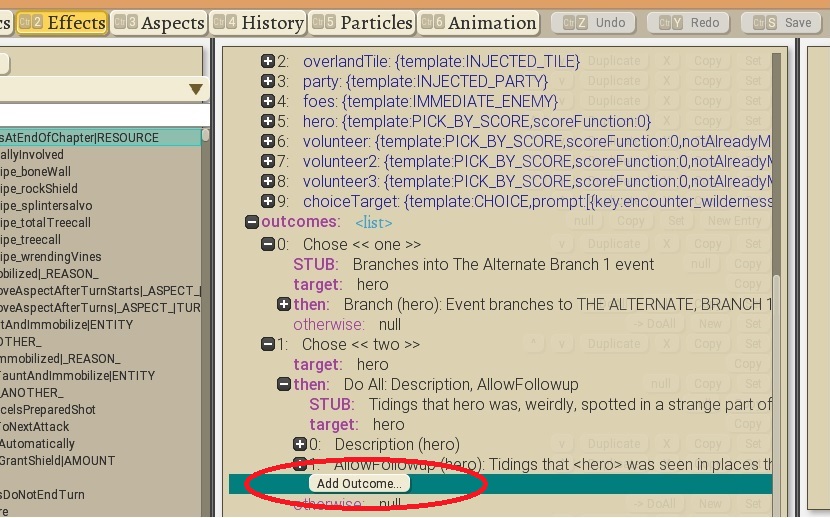
1) In the original event, under the Effects Tab, under the choice/outcome that you want to connect a Tiding to, click the "ADD OUTCOME..." button. This will open the "New Outcome" window.
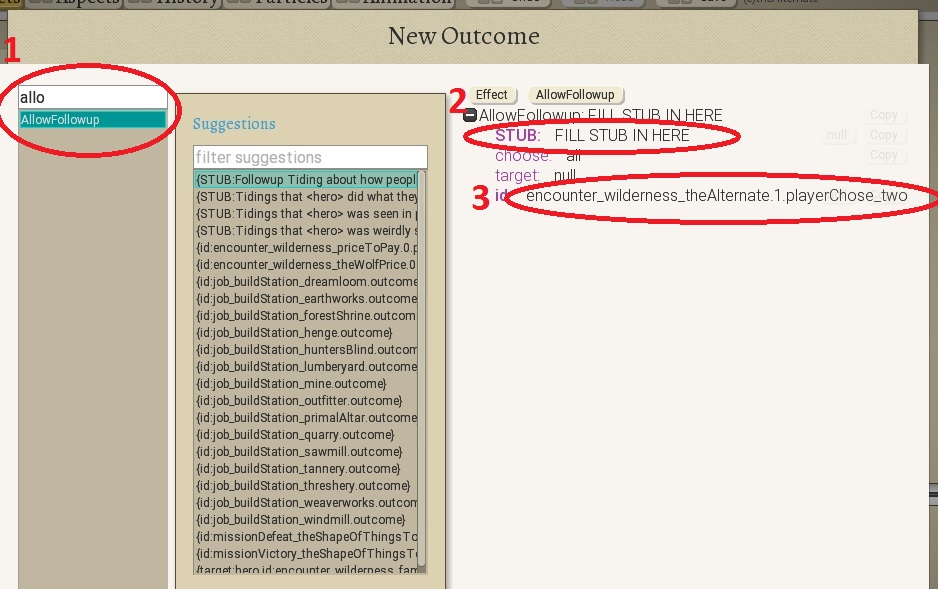
2) In the New Outcome window, start typing "AllowFollowup" in the text bar on the upper left. This will filter out all the other options for Outcomes. Once "AllowFollowUp" is the only thing left in the drop-down list, click on it. This will open the description window. Fill in the Stub field. Note the ID assigned by the system. You'll need to know this later. Then click "CREATE".
3) Now you're done with the original file. Go back to Effects and Start a New Event.
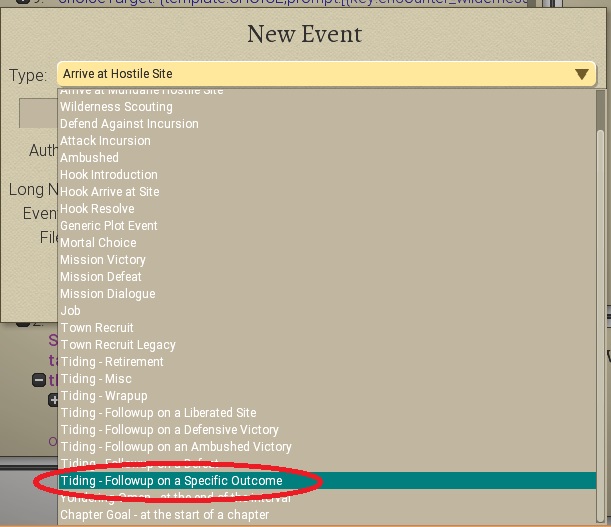
4) For event type, go to the drop-down menu and select "Tiding-Followup on a Specific Outcome" (it's down near the bottom of the list).
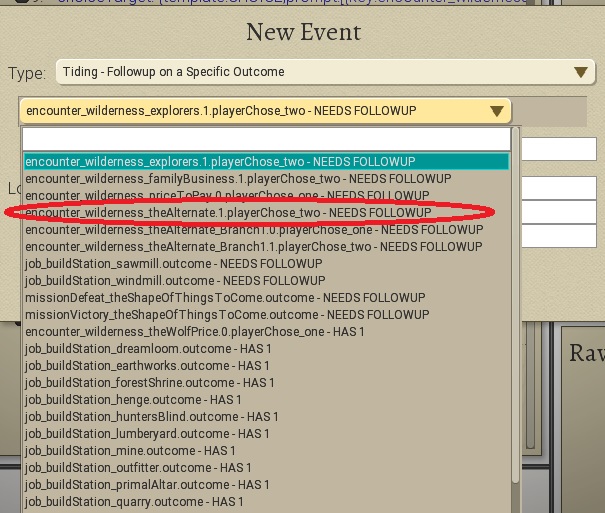
5) Now a new drop-down menu will appear under the Event Type menu. This is a list of events with outcomes that need Followups. Find the outcome ID that matches the one you saw in Step 2. This will connect the Tiding to the Event.
6) Now name the Tiding and create the event as usual.
7) Use the comics editor to create the Tiding. NOTE THAT TIDINGS SHOULD NOT BE MORE THAN ONE LINE OF COMIC PANELS.
