Difference between revisions of "Comic Editor Reference"
m (→Outcomes: Added link to Outcomes page) |
|||
| Line 70: | Line 70: | ||
=Comic Editor Basics= | =Comic Editor Basics= | ||
'''TODO rewrite this!!! panel tags and text splits don't exist anymore!! Document new Editor, Add Panel (Compose), and Split stuff.''' | |||
* Each box on the left holds text for a different section of the story: a prompt, a choice, or an outcome. | * Each box on the left holds text for a different section of the story: a prompt, a choice, or an outcome. | ||
* Plain text (none of those Microsoft Word special apostrophes and ellipses if you please...) | * Plain text (none of those Microsoft Word special apostrophes and ellipses if you please...) | ||
Revision as of 07:18, 29 April 2019
This is a collection of reference material that explains how to use the Comic Editor to tell stories.
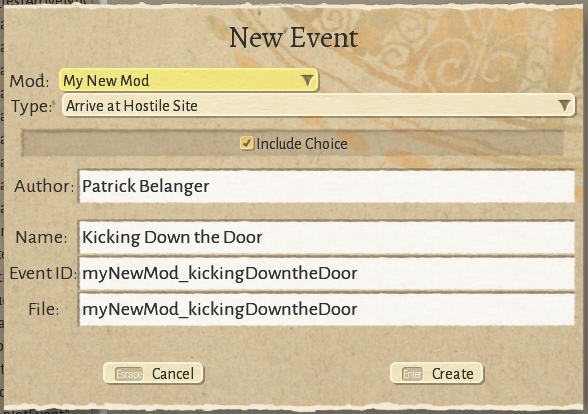
Make a New Event
- Open up Scratchpad
- go to the Content and Comics Editor
- Click on the Effects tab at the top or press Control+2
- Click the New... Button or press Control+N
- Select the type of event you are creating, for example Arrive at Hostile Site or Mission Victory.
- Enter your name if it's not there already. (The game remembers who wrote each event, and we may make this info visible to players. If you don't want to be associated with your events, or a particular one, we can work that out.)
- Enter a for the event name (in plain english, with spaces) for the event. The tool will create an ID and Filename automatically.
- Edit the id and filename if you want.
- Press Create!
Event is now exist! Maybe save?
Codestuff
Read this first: Story Inputs and Outputs
General Advice: Use the STUB fields to document intent, and leave notes about what SHOULD happen, especially if you don't know how to do something. It's totally fine to STUB out complicated effects or fiddly details that you're not sure how to handle. That's what programmers are for after all, right?
You CAN edit all this stuff, if you want to, but it's not necessarily recommended. If you're tempted, you can search for other effects that use the functionality you're interested in, and see if you can just do the same thing.
Story Roles
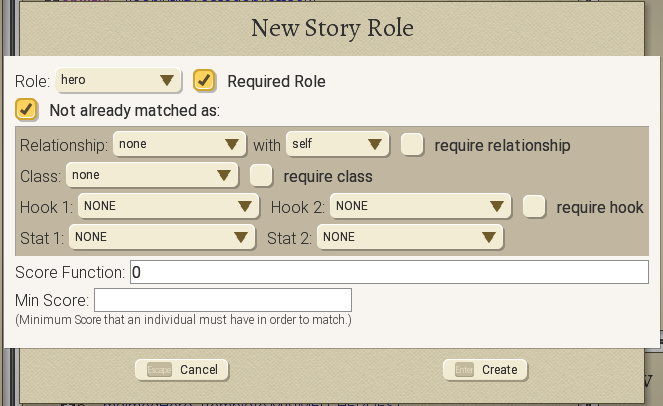
Now that you have an event, it's time to add targets for the important people, which is generally the heroes. The easy and right way to do this is to press the New Story Role button, which can be found on the same row as the targets header. You will need to mouse-over targets and the buttons will show up on the right. The New Story Role Dialog will pop up:
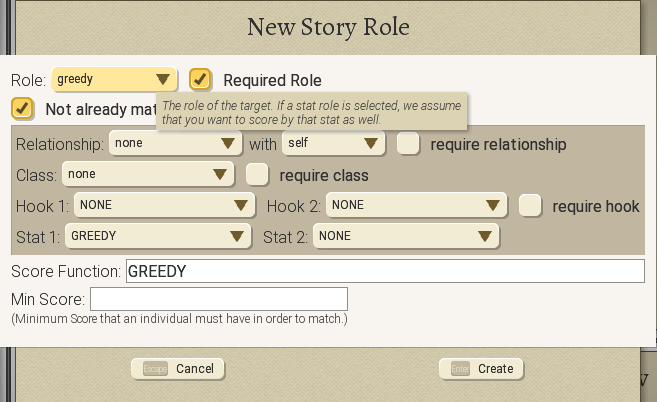
There's a lot here, but let's just look at the first dropdown box. Expand that down and you'll get a list of possible roles for this new target. The easiest and most common thing to do is to pick a personality stat, like greedy. This will automatically populate the dialog so that the greediest hero will be picked for this role, which is almost what you want, right?
But the point of all this mess is to help you select the most appropriate hero for a particular story role. In the end it all boils down to a Score Function, which you can see by playing around with the controls and seeing how it changes.
A few other notes:
- If a Required Role is not present, the story won't happen. This is usually what you want. This way you can be sure that if the story is being told at all, the right characters are in place. Sometimes you have a role that's not too important, and you can make it optional.
- The Not Already Matched As checkbox is actually disabled if this is your first story role, but for number two and on, it makes sure that this person isn't the same person you selected for a previous role, because then it might seem like they were arguing with themselves, which is only sometimes what you want.
- Remember, targets are selected in order, and by the time you get to number three or four, it's unlikely that the Romantic is really an iconic romantic, so put your most important/iconic/identifiable roles first.
Create as many roles as you need. Usually that means one per speaking role, and remember there are never more than 5 heroes in a party, but there can be more than that in the company. So, it depends what kind of story you're telling.
Other Targets
In addition to Story Roles, you can create other targets. One useful template is LEGEND, which allows you to pick NPCs that have been generated at the start of the game, and/or maybe if we get around to it, pulled from the player's legacy. Use the legendId field to specify who you want.
TODO explain more.
Choices
Some events call for choices. In this case, there's generally a prompt, which is a set of comic panels, and then a choice, which is several panels, some of which might only be present under certain circumstances. Anyway to add a choice, do this:
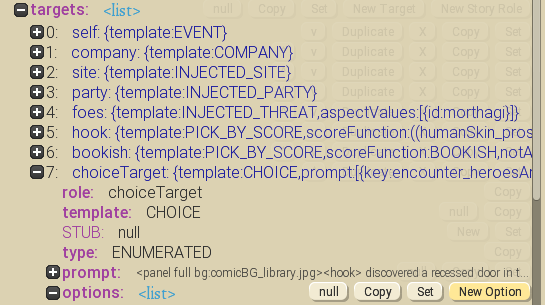
- expand targets->choiceTarget...
- See options right after "prompt".
- Click on the New Option button
- to bring up the New Option Dialog
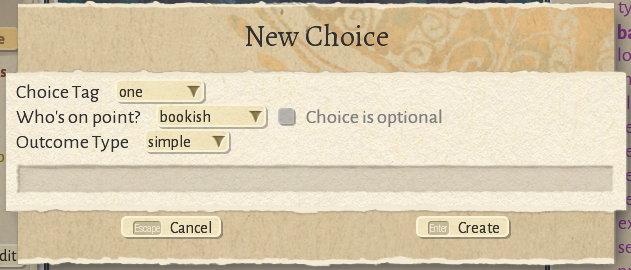
This lets you pick a tag (which is not too important except that the outcome will use the same tag). Then you can pick who will be speaking, and you can make the choice optional, so that if that character is not present, the choice won't show. Then you can choose if you want to add any branching, like a dice roll with a chance of multiple outcomes. Most commonly you will pick "simple" or "event roll."
TODO more explain.
Outcomes
Specify what should happen as a result of choices, or chance.
Details on how to do this can be found on the Outcomes page.
Use the STUB field as a place to write down what should happen without touching the code.
We need to add more functionality here, like, probably a lot. For now it is STUB City.
Comic Editor Basics
TODO rewrite this!!! panel tags and text splits don't exist anymore!! Document new Editor, Add Panel (Compose), and Split stuff.
- Each box on the left holds text for a different section of the story: a prompt, a choice, or an outcome.
- Plain text (none of those Microsoft Word special apostrophes and ellipses if you please...)
- Press the save button!
- Undo should work, but sometimes need to press it more than once.
Making Panels
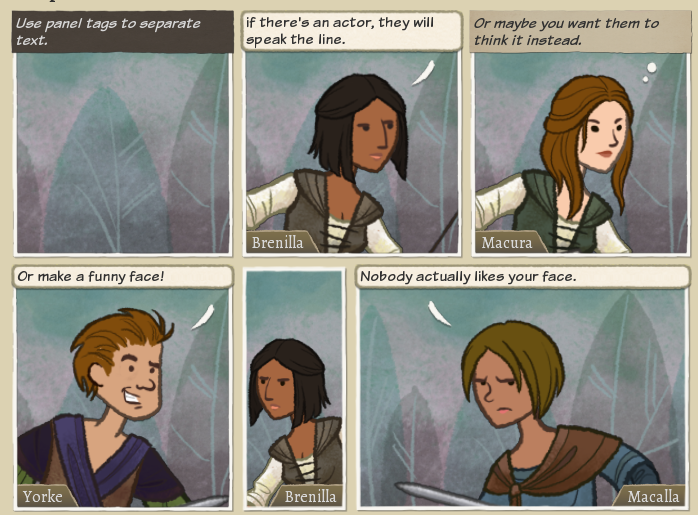
Use <panel> tags to separate text into panels. It's pretty easy to specify panel sizes and add actors with facial expressions and basic functionality.
<panel>Use panel tags to separate text.
<panel|bookish>if there's an actor, they will speak the line.
<panel|poet thinking>Or maybe you want them to think it instead.
<panel|goofball joke>Or make a funny face!
<panel sixth left|bookish grim size:1.75>
<panel half left|snark sad >Nobody actually likes your face.
Everything about a panel is stored as text, in the panel tag. These examples show how to use panel styles (left, sixth, half), how to add actors ( |rolename ), and how to add actor styles (thinking, joke, grim). Panel styles are convenient for quickly making panels, but panel tags can get cumbersome fast. Good thing is, we have a visual editor so you don't need to edit all this stuff by hand.
To open up the Panel Editor, click on a panel in the Comic Editor display. You can use the visual panel editor to do almost everything, including adding actors, setting their facial expressions, really everything except creating new panels and modifying the text that goes in them.
- Protip: Panel tags can be copied and pasted around as a quick way to duplicate a scene.
Using Tags to Control Text
See : Tag Reference
Each event can specify a number of targets, which are often heroes, selected for a particular personality, relationship, etc.. These targets are assigned to roles. Roles are easy-to-remember words like leader, target, hero, hothead, friend, etc..
Once you have a target assigned to the role, you can insert the target into your text using a role tag like this.
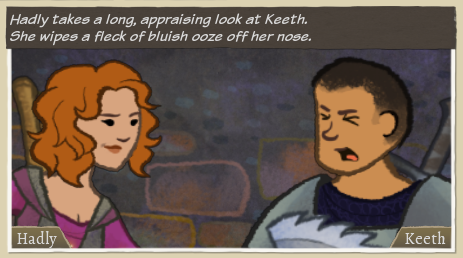
<panel twoThirds |leader narrating|hothead pained>
<leader> takes a long, appraising look at <hothead>.
<leader.mf:He/She> wipes a fleck of bluish ooze off <leader.mf:his/her> nose.
This is a simple example but we can get a lot more sophisticated, and tags can be nested as well. That can get really confusing. Maybe we should build some better tools?
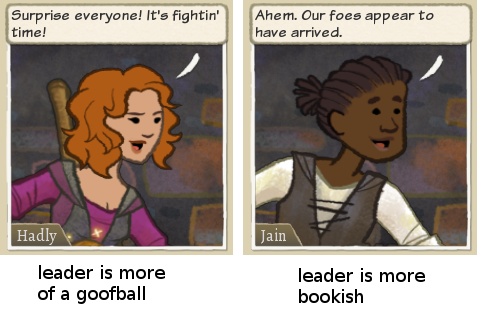
One of the key uses of tags is to give heroes different lines depending on their personalities. This works by embedding the stats you care about in the tag.
<panel |leader talking>
<leader.goofball/bookish:
Surprise everyone! It's fightin' time!
/Ahem. Our foes appear to have arrived.>
You can embed tags within tags. The most common use case will be putting gender tags inside personality tags. But you can go further if you want to. You can even use tags to select whole panels, like this:
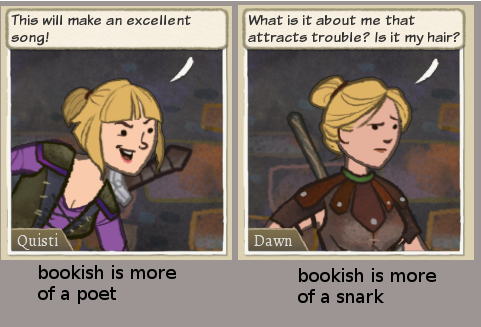
<bookish.poet/snark:
  <panel|bookish joy>
  This will make an excellent song!
/
  <panel|bookish skeptical>
  What is it about me that attracts trouble? Is it my hair?
>
Here's an example of embedding three different personality statements within the same panel:
<participant.greedy/coward/healer:<panel|participant joy>The piles of loot they leave behind! / <panel|participant scared> I just want it over and done with as quickly as possible!/<panel|participant grim> I do this because I must. I take no joy in killing these creatures.>
Note that the personality split tags on the outside, and the individual panels are on the inside.
This can get out of hand very quickly, but might be useful for reaction panels, or whatever? I don't know. Be careful out there.
Tags can do a lot more! For a full list of available tags see : Tag Reference.
Style Markup
See: Text Styles
Text in a comic panel gets a style automatically depending on if the TextBox is set up as narration, speech, thought, etc.. The Style can be modified using square brackets. Generally, text-style markup is similar to html markup, in that you have a starting and ending tag, BUT! our style format doesn't require the end tag to have anything in it.
It looks like this:
[bold]bold text [italic]Bold italic text[]bold again[] regular again.
TODO add some pictures of styled text here
You can set the size, color, and font of the text. See Main article on Text Styles for a full list of available fonts, styles, and colors.
Other Details
TODO document all the buttons!
